> ## Documentation Index
> Fetch the complete documentation index at: https://docs.ideatura.ai/llms.txt
> Use this file to discover all available pages before exploring further.
# Dimension grids in a floor plan
> Set grid-dimension inputs, run on one Revit plan and inspect the dimensions in Revit.
This example runs **IDEA\_Dimension\_Plan\_Grids** on a duplicate view named **DOCS - Grid dimensions**. The original **A-GA-01-Plan** remains unchanged.
1\. Choose the automation
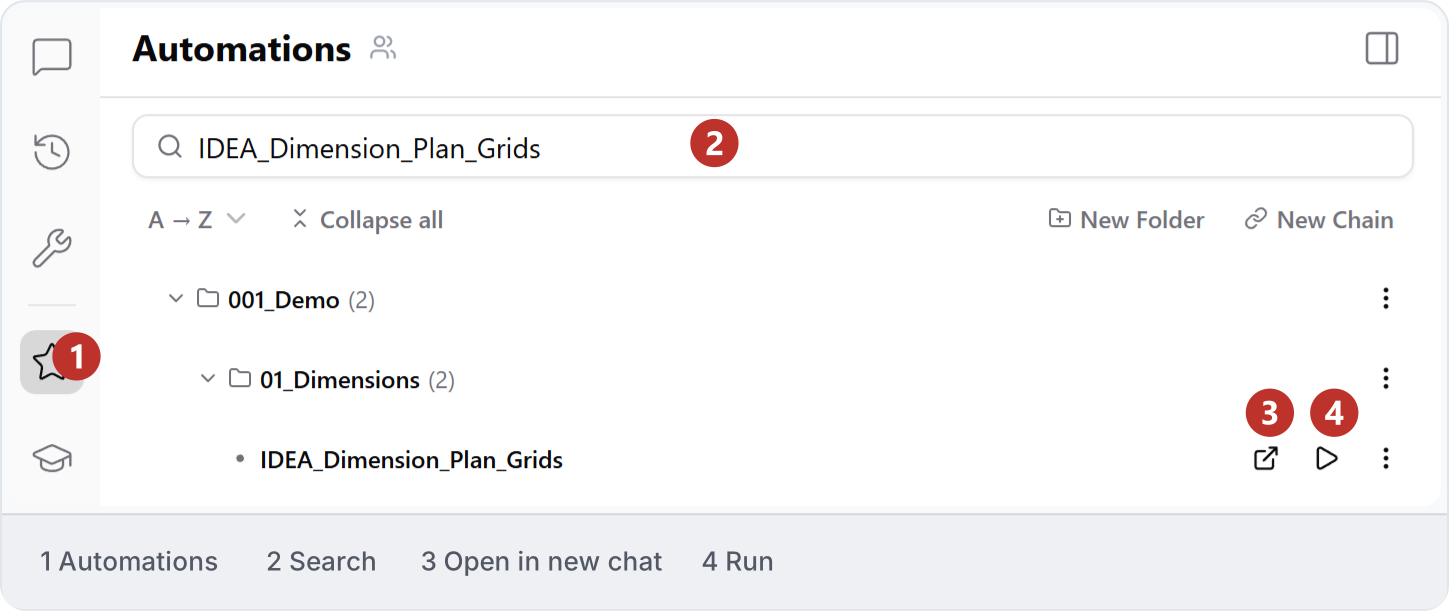
Open **Automations** and find **IDEA\_Dimension\_Plan\_Grids** in your workspace. Confirm the connected Revit document and select one floor plan. Use a duplicate view for the first test, then inspect existing dimensions before running.
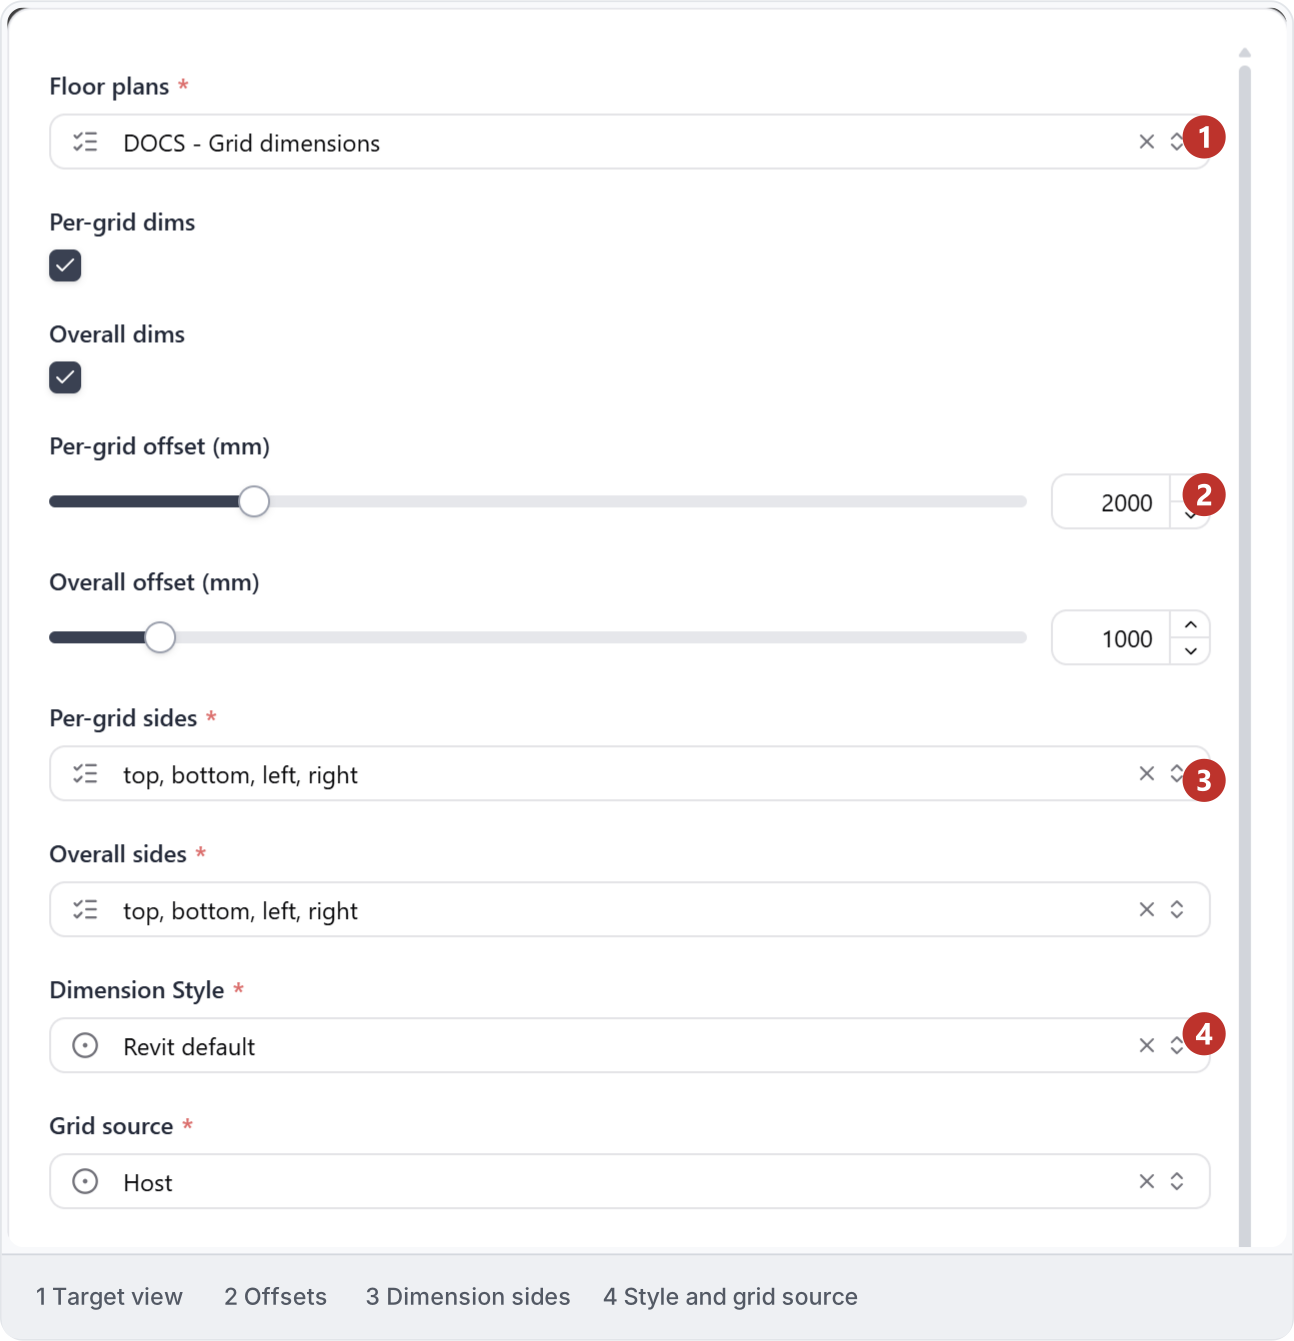
 For this sample, enable individual grid dimensions with a **2000 mm** offset and overall dimensions with a **1000 mm** offset. Select **top, bottom, left and right** for both. Use the **Revit default** dimension style and **Host** grid source, and leave **Move dimension numbers** off. These offsets are example inputs; choose values that suit your drawing.
3\. Run and inspect
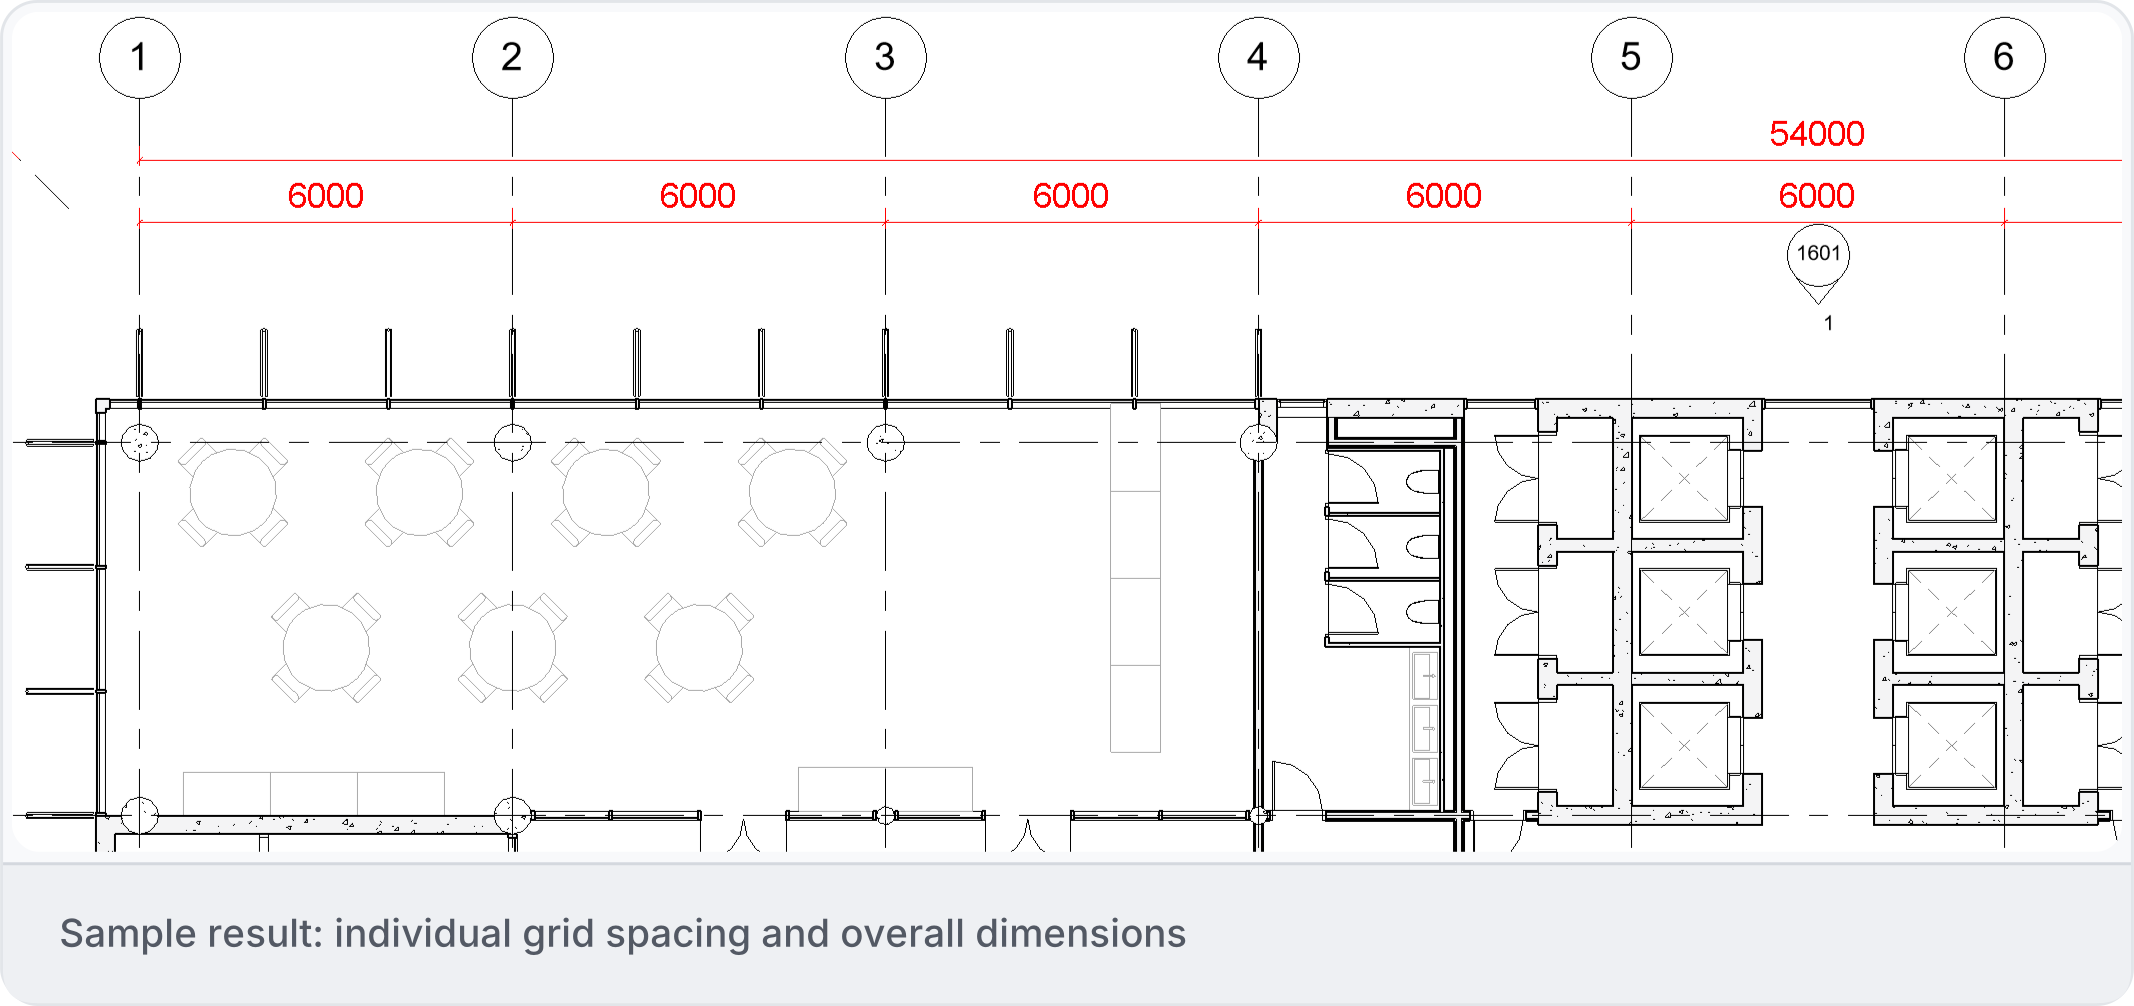
Choose **Run** and read the summary. This sample reported **16 dimension strings created**, **0 text placements updated** and **no warnings**. Inspect the plan in Revit as well: check grid references, individual and overall values, offsets and readability, including the diagonal corner grids.
4\. Reuse the workflow
Save the checked model and review the inputs before selecting another view. Confirm how the automation treats existing dimensions to avoid duplicates. The number of strings depends on the selected grids and settings; test a second small case before expanding to [Batch dimensions](/draw/annotation/batch-dimensions).
This documentation is built and hosted on [Mintlify](https://mintlify.com), a developer documentation platform.